appnext

Tampilkan postingan dengan label 1965. Tampilkan semua postingan

Rabu, 30 Desember 2015

Safer Motoring

Thanks to a well known online auction site I managed to get my grubby mitts on a collection of old British VW 'Safer Motoring' magazines from 1965!


It has been fascinating to flick through the pages and see what was going on at the time my bug was born, such as the prestigious award for Miss VW: 


Then of course are all of the vintage adverts for accessories for me to droll over. With this accurate reference material I now have a wish list of accessories to fit the period of my car. Just got to keep my beady eye out now:


Even in '65 they understood that if you wanted to market a set of boring foot well mats, then you can always rely on the fact that sex sells:


I want to wrap this post up by wishing you all a Happy New Year! My sincere thanks to you for your continued interest in this resto journey. 2016 should see some big leaps forward...

Kamis, 16 Januari 2014

Gretchen, aged 5

Happy New Year! I thought it would be great to start 2014 with a bit of a treat that I have been holding back for a special occasion ....a glimpse of Gretchen as she looked back in 1970!


Although I cannot disclose too many details for confidentiality reasons (hence the crop), I can tell you all that I managed to make contact with one of the original owners of the car at the tail end of last year. We talked at length about his many years of ownership and we swapped a few stories about her past adventures. Later that same month he forwarded a lovely letter from his daughter (who also owned the car for a while), which included a family group photo with Gretchen (yes - it has now been officially confirmed that this was always her name!) peeking through in the background. I am so grateful to them for sending this photo and for taking the time to inform me about the cars history. It completely blew my mind! The picture provides me with so much motivation every time I look at it, so I now have a framed copy ready to hang in my garage! 

Ohh, and I just love those vintage VW logo mudflaps - another item for my wishlist.

Selasa, 24 Desember 2013

What began a little distraction...

In between my welding practice I have been tending to a few rusty areas on the shell that have been distracting me from out of the corner of my eye. However, what began as a few minor areas has sort of snowballed (excuse the festive pun). Here is a quick run-down of the past couple of weeks of activity...


Crusty deck lid area:


The lip that holds the rubber seal was in pretty bad shape, so I decided to remove it and grind the area flat. I will most likely use the later type of engine seal - the one that fits directly onto the deck lid.


Drivers side rear quarter:


This was an area that had become really bad soon after I bought the car and I remember it failing its MOT one year because of the state of it. I had no choice but to take it to my local garage who advertised themselves as being specialist in vw restorations. Well, it turns out that what for years I assumed was just a 'skim' of filler to smooth out any imperfections turned out to be a dense layer that was hiding lazy repair work:


Once I had removed all the filler and turned my garage into a winter wonderland (the dust got everywhere despite using an extraction system) I could assess what had be done. Basically they had taken a flat section of sheet steel and made no effort to shape it to the contour of the car. They have then appear to have tack welded it into position and hastily ground the welds flat(ish) leaving unsightly abrasions all over the place. This was finished up by slapping copious amounts of filler (3-4mm thick in some places) over the top and sanding a fake profile. What a lazy bunch of cowboys!


I marked up the panel and cut out the abomination without delay. I found that the 'pros' hadn't even made an effort to treat the back of the repair patch and had just left it as bare metal, which had obviously rusted up nicely over the years. Oh well, the offending section is out now:


I then moved on to the inner arch area and figured I would strip it so that I could see what was going on beneath the underseal.


As expected there was quite a few old repairs and other repairs over the top (like patchwork in some places!) but there were vast areas of good condition original steel which was a welcome sight. I treated the whole area with a rust inhibitor before keying it up with the electric sander:


Then added a liberal coat of primer to keep the panel fresh until I get around to making the repairs. It funny - I hadn't intended to touch touch the shell until I had finished and rebuilt the chassis, but I must admit that it feels like a good to see some advancement whilst i'm mastering my welding technique! 

Senin, 07 Oktober 2013

Test fitting the floor pans


Exciting times! The Wolfsburg West floor pans arrived last week, so I couldn�t resist a quick test fit to see how everything lined up;


They cost a pretty penny, but I feel it has been money well spent having inspected the excellent quality of the pressings.

Senin, 15 Juli 2013

Shiny, shiny metal!

I have to dedicate the next couple of weeks to some personal work, so my garage time is going to be severely restricted. So, I thought I would go for a 'quick win' and strip back the entire underside of the chassis before I slack off. This knotted angle grinder wire wheel was the best method that I found for taking off the thick underseal crust:


An interesting view of my workspace filled with a dense atmosphere of dust. I really like the shards of ethereal light hitting the pan! I decided to set-up a better system for dust extraction at this point as my satuarated mask could only take so much:


After a few hours of messy but fun (honestly) work I had everything stripped and thankfully it all appears to be rather solid:


However, I did come across some ugly welding on both sides of the transmission mount. Although this part of the car will never be seen I will probably clean this area up nonetheless - after all, I will always know that it is there!:  


The only area that is a little shabby is just at the front by the Napoleon's Hat. Nothing too major - just some pitting and a few pinholes: 


Looking fresh after a lick of metal primer:


Jumat, 12 Juli 2013

Bump n' Grind n' Prime

Nothing major to report this week, just been doing a lot of precision grinding to clean up the excess metal from around the bottom of the frame head. Those old seam welds certainly take some time to grind flat! I then wire wheeled the whole area back to bare metal using a combination of drill attachments. Here is the result of my careful labour:


A close-up of the front lip after grinding the welds down so that the steel is back to original thickness:

I grabbed an old spray can of metal primer off the shelf and gave it a liberal coat to prevent any surface rust creeping in whilst I strip and repair the rest of the chassis. I will eventually clean off this paint and replace with something more appropriate - It should do fine for now though:

Senin, 24 Juni 2013

Spot weld cutting

Well, as you can see from the picture below (taken a few weeks ago) my framehead bottom plate is in a sorry state, particually on the drivers side. Just look at the size of that rust scab!


Thankfullly the rest of the frame head seems pretty solid so I have decided to cut off the whole bottom plate and replace it with an aftermarket panel. I will then clean up the rest of the frame head, which should only need minor repairs (if any). I am keen to retain as much of the original metal work of the car as possible and figured I would salvage the brake line brakets and graft them onto the new panel. I have heard that the ones that come attached to the replacement panel are flimsy and utterly crap, so I think this will be worth the little extra effort. I have circled them in red below:


Flipping the pan back over I started out by wire brushing the area below the brackets and then lightly sanded to reveal the location of the spot welds. As you can see there are 3 distinct spots under each bracket which needed to be drilled out:

This is the spot weld cutting bit for my drill that I opted to use. Basically I used a centre punch to create a dimple in the middle of each spot weld then placed the spring loaded guide pin (the protruding part you can see on the left of the photo) into the depression:


Working with the drill on a slow roatation I steadily cut through just the top layer of metal:

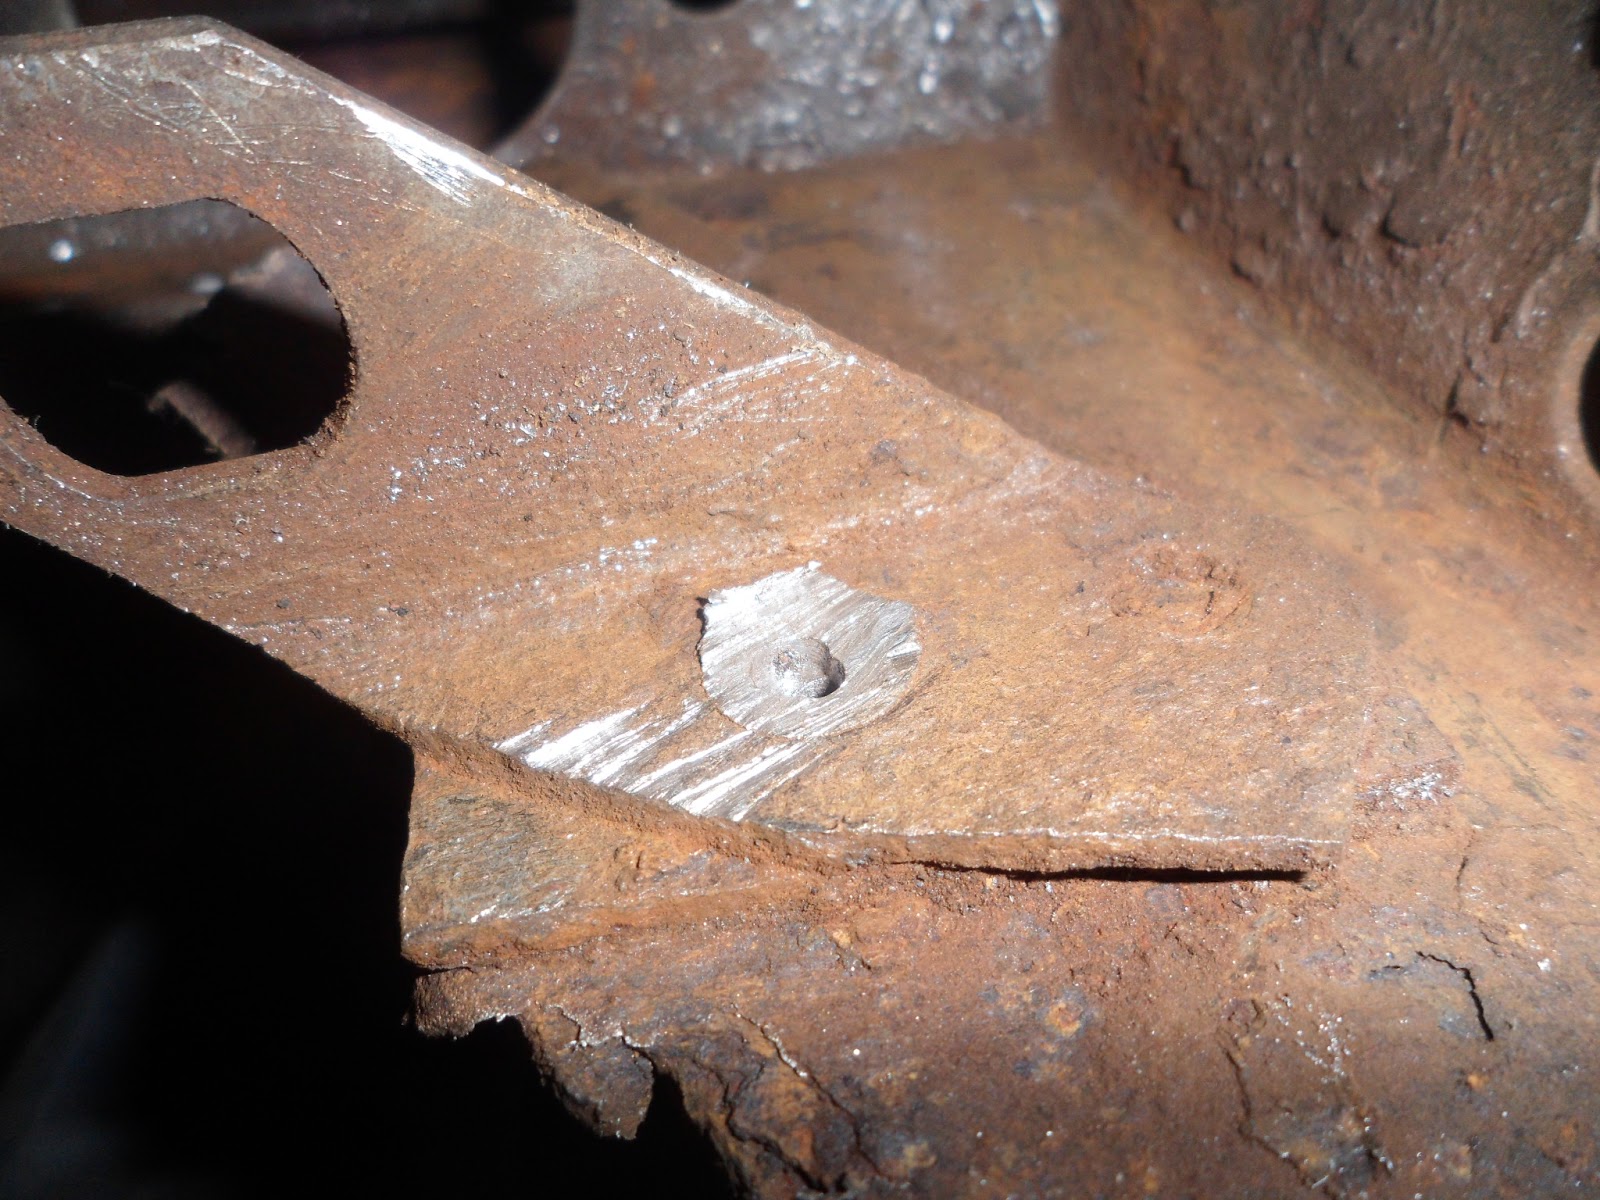
Then gently separeted the bracket from the old panel:
 
I then clamped the piece into a vice ready for grinding down the excess weld material:


Here is the piece after grinding. Now it just needs cleaning up and a quick lick of paint to keep it from rusting until the time comes to attach it to the new panel:


Now that I am practiced in the art of spot weld cutting I better crack on and drill out all the little buggers that are holding the bottom plate in place...

Rabu, 19 Juni 2013

Pan rotisserie (and other short stories)


Most of the past couple of weeks have been spent organising and equipping the new garage as well as clearing out the old one. I have now built a workbench, layed out a tool board, put up shelves etc. In between these tasks I have made time to continue cleaning up the chassis. I decided to start by removing the rough cut floor pan remnants away from the supporting lip that runs along either side of the tunnel. Initially I was using my air chisel, but found it to be quite severe and could easily damage areas of the old metal that I was keen to save. So, I opted to do it by hand using pry bars, long screwdrivers and hand chisels. I basically worked my way around the parimeter popping off the spot welds one by one:


In theory this should have been a quick win, but the reality was that it took 10 times as long owing to all the past botched repairs and inconveniently welded parts that had be stuck together in areas that should never have been joined. For example; one seat runner was welded to the tunnel rather than spot welded to floor pan.... and then there were repair plates that had been placed over severely rusted areas without the old rot being cut out first.... Anyway, little by little I made progress and took the excess metal off cleanly. 
 
Next up was a seized bolt that was holding the pedal mounts in place. I tried everything to get it turning � penetrating oil, heat, wire brushing � but the stubborn little thing did not want to budge! I felt the only way forward was to carefully drill it out. I started by centre punching the top of the nut and then drilled a small pilot hole. Using a wider drill bit I slowly widened the hole:


I then switched to my trusty electric saw and made a horizontal cut to get rid of the overhanging sides of the bolt:


When I got the cut flush I simply tapped the piece out:


It took some time a patience, but I was pleased with the outcome


The next task will be to wire brush the old paint, underseal and dirt off of the framehead and bottom plate so that I can assess how much metal work needs replacing. To make this impending task easier I decided to build a simple wooden pan rotisserie so that I could reposition and rotate the chassis as desired without breaking my back each time. I constructed the framework entirely from scrap timber that had been left by the previous occupant and thanks to the fact that I can now operate my power tools (electricity, beautiful electricity, I am loving all 240 volts of it!) I had it built in no time. The only problem I came accross was how to secure the rear frame horns to a pivot piece. The original bolts were simply not long enough to pass through a piece of wood and reach the internal threads. I looked about for equivalent bolts of the same diameter with a longer shaft, but they were either ridiculously expensive or had a different screw profile. I ultimately concluded that trying to force a modern bolt to fit could lead to the threads becoming deformed or weakened. My garage neighbor, Tony, then came up with a simple solution; take a thick length of dowell (slightly oversized), taper the end and screw it in so that it threads itself:

I was dubious at first, but decided to give it a go and was impessed with how sturdy it seemed. I added a piece in on the other side and cut the dowell to a desired length. I then gently tapped on the connecting wooden pivot piece using a rubber mallet. 


This joint should hold well for the duration of the pan restoration. 


Here is the finished product with braked swivel casters added and the pan mounted up:


Simple and effective! Now I am ready for the fun to begin....