appnext

Senin, 02 Februari 2015

You were only supposed to blow the bloody doors off!

I have about half a dozen partially written blog posts sitting in draft form almost ready to publish, which pretty much mirrors the current state of the restoration; lots of partly finished things that I am slowly progressing without any big note-worthy leaps forward. Things are still cooking, but not in an easily definable way! There are a few factors that have slowed the pace down and these are my lame excuses in a nutshell:


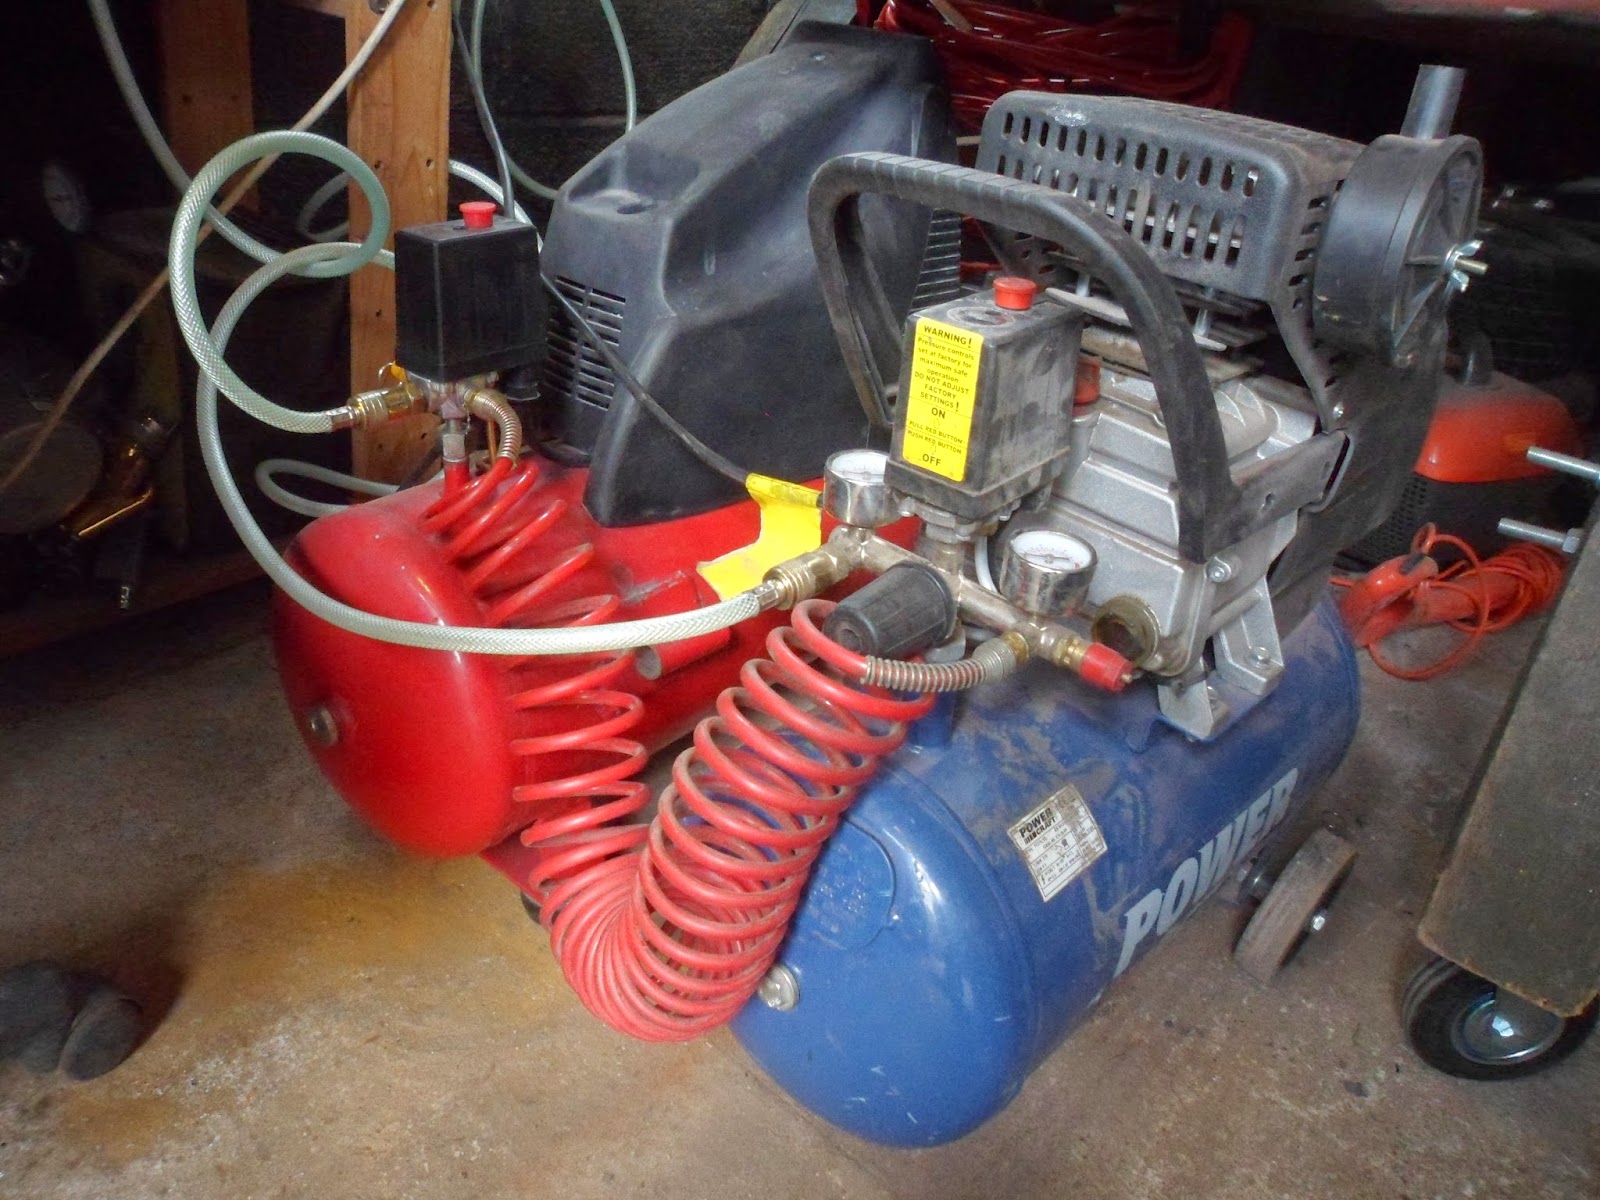
  • No access to MIG welder - since my garage neighbour has moved out I have been on the hunt for a suitable (and affordable) replacement machine. Unfortunately the old beast I was using has relocated with him!
  • Too cold for paint - at the moment I cannot bare metal my components as the Mastic paint cannot properly cure in winter temperatures. Frustratingly I had a bunch of parts that I had already shot-blasted, but not put into paint and they have already started to rust again ....you live and learn!
  • Life outside the garage - the past few months have been a blur of other conflicting activities demanding my attention. 

So to ease myself back into regular and structured emails I have decided to be a bit more 'bitesized' with my offerings. Basically, shorter posts more frequently. To kick off the New Year here is a little overview on door removal:


First up I removed the pin and detached the bump-stop-hinge-arm (for lack of technical name):


This can then be withdrawn through the cavity between the door skins:  


To detach the door hinges an impact driver is obviously pretty handy. However, there were some bolts that just would not budge (something that I have become accustomed throughout this project!). For the tough ones resorted to my old friend LEVERAGE! I fitted the impact driver attachment onto my breaker bar and slowly applied pressure. This got the stubborn buggers moving without any trouble:


With the six screw bolts out the door can be lifted off:


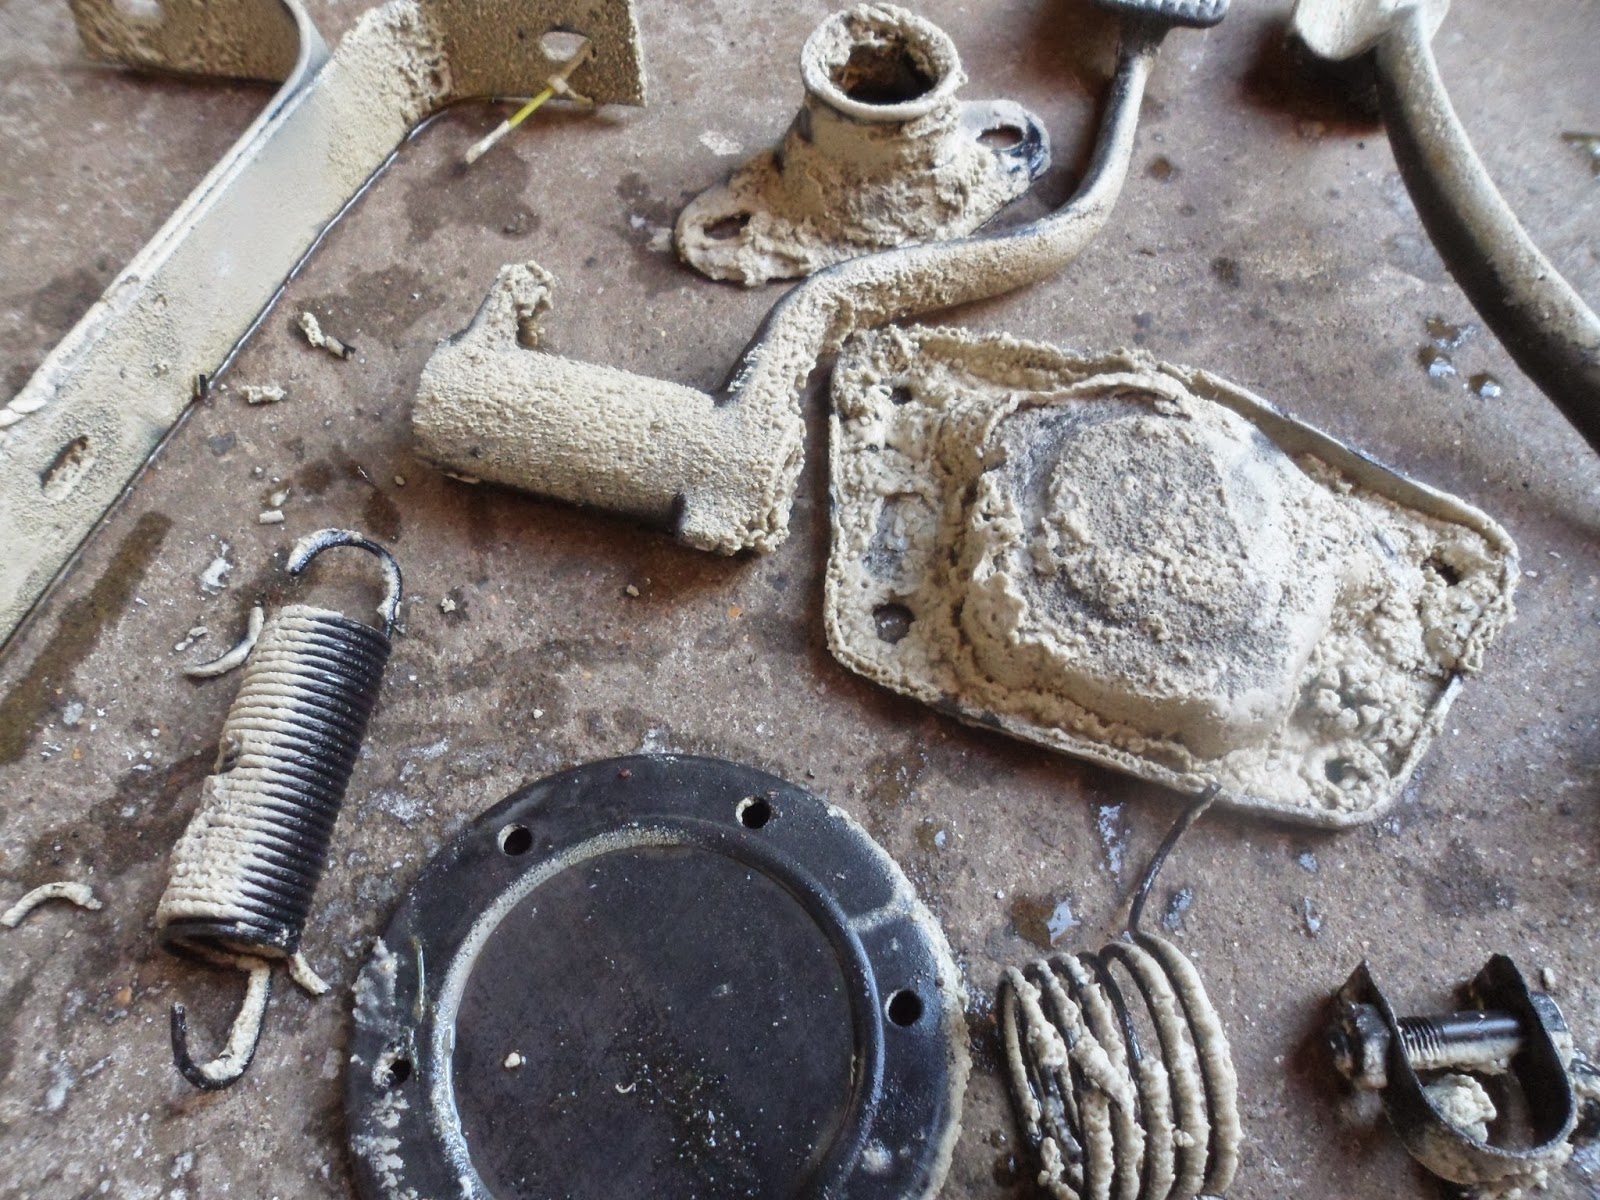
I then withdrew the door glass and disassembled the winder mechanism, handle unit and quarter light:


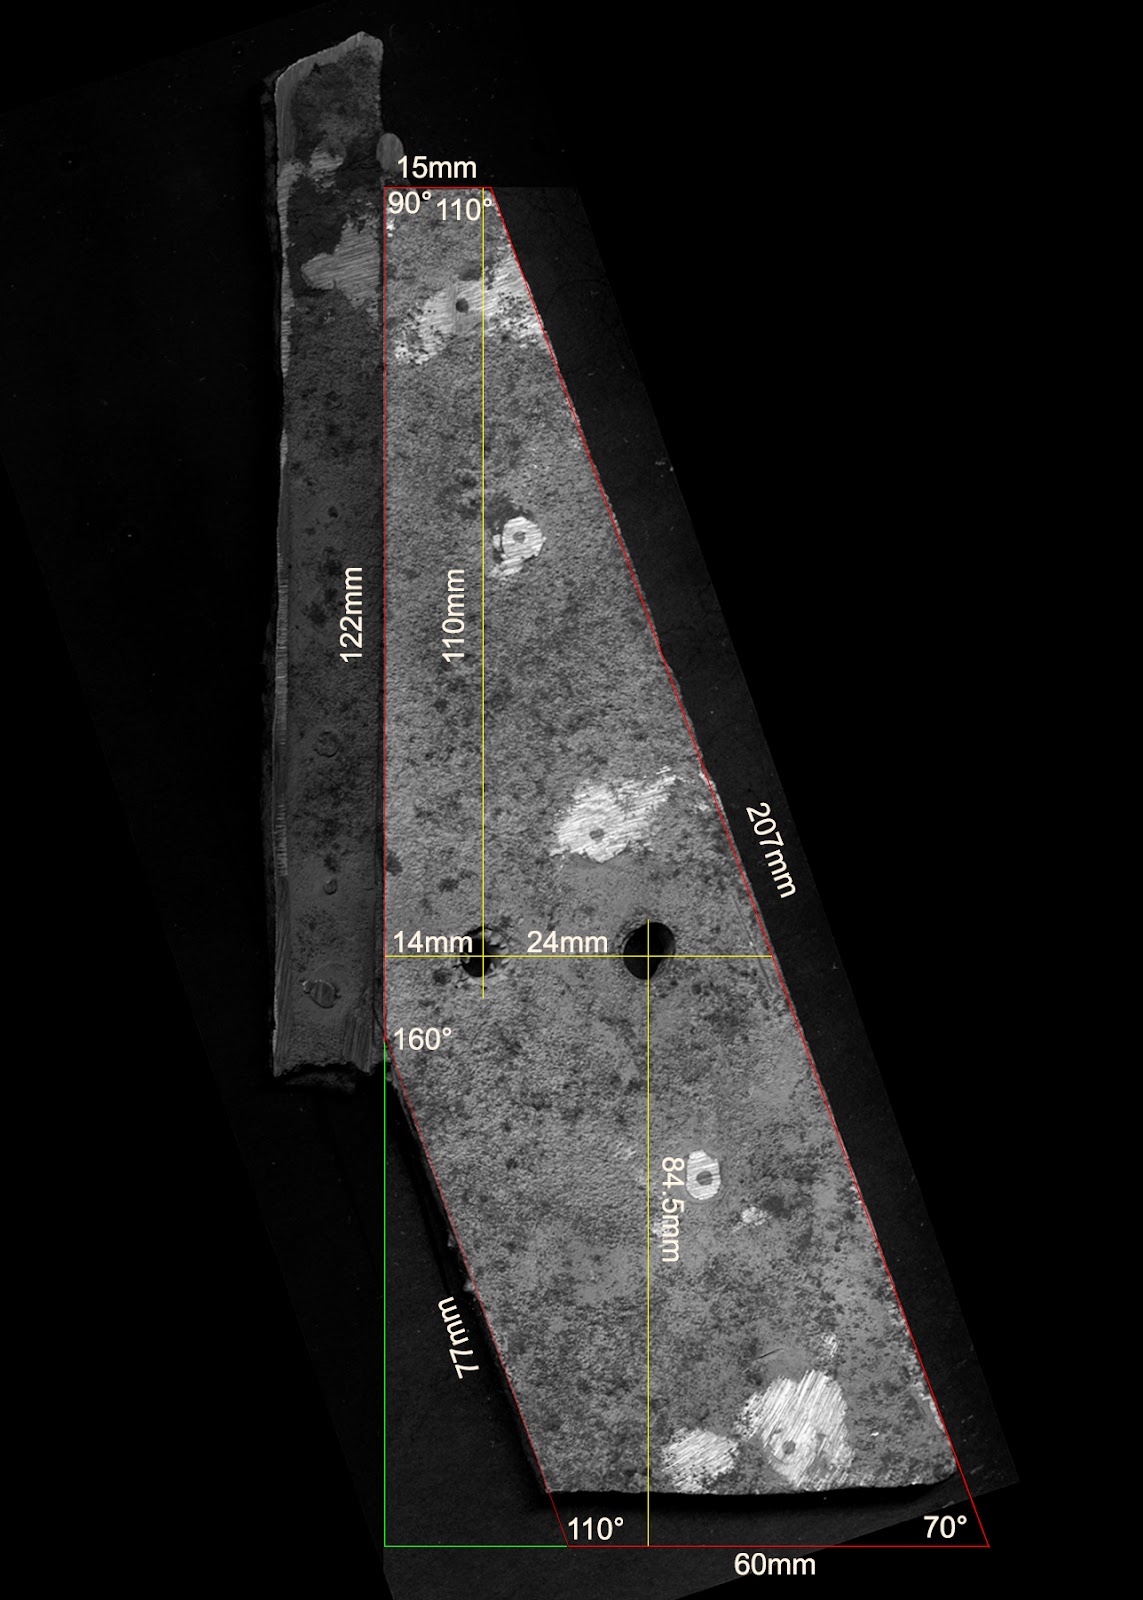
Both doors are now ready to be stripped of paint (and probably hidden filler!), repaired and panel beat back into shape.

More updates to come. Soon. Promise!

Selasa, 30 September 2014

Back to the pan

So much of my time lately has been absorbed in researching, thinking and planning the next stages of the resto. However, I think it has been necessary for me to take a back step, reassess the priority areas and unblock some issues that were preventing me progressing. Ultimately I concluded that I needed to refocus my attention on the chassis and crack on with maximum vigor! Firstly, I had a brain dump and wrote out a check list (in no particular order) of all the odd jobs that need doing before the chassis would be ready for paint: 


I have now set myself up with a decent supply of Argon/C02 welding gas: 


With a new regulator fitted and plumbed into the MIG welder. It works like a dream:


The WW floor pan halves that I bought a while back were designed for a LHD car and I needed to consider how I would go about converting them to RHD and make it correct for for a '65 pedal assembly setup. Through my research it became apparent that there should be a small strengthening/reinforcement plate which supports the pedals. Some bugs appear to have this strengthening plate visible on the top side of the floor pan, but there was no trace of this when I dismantled the components from the old pan. Strange I thought... then I recalled cutting through what I thought was an old scabby repair patch last year and realised that it was actually the reinforcement plate (the layers of rusted crud were masking its true identity!). An intensive search on Google images and various VW forums confirmed that the plate sits underneath the pan on the '65 model. Luckily I have been retaining all the old scrap cut from the car to use for welding practice. This was this old chunk that I was looking for: 


I chiseled off all of the rust flakes and it all became obvious:

The plate itself is basic enough, so I will be making a new one out of 5mm flat bar. The long edge is basically seam welded to the point where the edge of the Naps hat and bottom plate meet. The short edge is seam welded to the lip of the chassis tunnel and there are also a series of spot welds that fasten the floor pan to the strengthening bar. The two (threaded) holes in the middle are for the mounting brackets, which sit on top of the pan � which is fortunate as it means that I will just needed to drill 2 holes in the new drivers side floor pan in order to adapt it to RHD.

The only minor problem was that I had not cut this piece of flush when I separated it from the tunnel. This obviously meant that the plate was now slightly shorter than it should be, but I did not know by how much exactly. After a thorough rummage through the scrapped pan offcuts I reconstructed the front edge of the old pan. I then clamped the plate to the old floor pan scrap being sure to line up the bolt holes: 


I then clamped the reconstructed mess to the chassis tunnel in its original position for assessment. This enabled me to ascertain how much of the original reinforcement plate had been trimmed off: 


and here is the view from the underside:


Turned out that the plate was between 8-9mm short:


Armed with this new knowledge I created a reference drawing to act as a pattern (see the red outline) for when I make the replica part. I probably spent far too long producing this in Photoshop, but if it's worth doing then it is worth doing right:

Selasa, 02 September 2014

Vinegar, rinse, blast, paint, repeat...

After a lot of experimenting I have finally settled on a method for taking rusty components and transforming them back to good-as-new. It all starts a lot of vinegar, citric acid powder and a Bristol City council recycling bin:


I came across this method after reading through an amazing build thread over on Volkszone, so full credit to Andy Sweeney (aka: Last Triumph) for originally sharing this idea.  Basically, once the vinegar and citric powder have been mixed, you simply submerge the dirty components in the acid bath as they are, close up the bin lid and wait. Over the course of a week or so the solution dissolves the grease, dirt and much of the rust. 

A word of warning in case anyone reading is considering doing this; the vinegar bath should be used on components that do not have a structural purpose. This is due to potential embritllement, which could compromise the integrity of such parts. So, no suspension, steering boxes etc!

The results straight out of the bath are impressive... Here is a before shot:


After:


However, when I put a second batch of components in the vinegar solution I unintentionally left them in a bit too long (summer is full of distractions and tangents!). When I pulled them out I was baffled to find that they were covered in a stubborn residue like a coral reef:


I am unsure if this is the result of the sediment from the previous components that were cleaned or simply what happens when you leave metal parts submerged for too long. I guess another possibility is that the citric acid powder and vinegar somehow breaks down or alters over time?

Unexpected coral reef cultivation aside, the parts are then rinsed in water and any loose dirt is cleaned off with petrol and a toothbrush or wirebrush:


The parts then go into the blast cabinet and without that stubborn coating of several decades worth of accumulated crap encasing everything, it only takes a minimal amount of time before they are done. Not only does this process remove the last traces of rust, but also provides a perfect key to the surface ready for paint:


Its then a case of masking (if required), mixing up some Mastic 121 and painting it on using a regular brush:

Selasa, 22 Juli 2014

Modifications to my blasting rig

I have finally got myself a second compressor at a bargain price, whoooo! �although I later found that it had a cracked air manifold with a bodged repair, boooo! �thankfully it was very cheap to replace the whole damaged piece. Anyway, after lots of head scratching I linked them up to each other as shown in the photo below:


With both compressors running in tandem I can pretty much blast constantly without ever dropping below 100psi. The only thing to be considered is the duty cycle of the compressors, particularly as they heat up quick! So far I have been blasting for about 10mins and then take a break (well, finding something else to do) for 10mins to allow the compressors to cool down. It is a huge improvement, but blasting is still a slow process with a relatively humble set-up such as this!

To take care of the dust cloud issue, which fills the cabinet within 5mins of blasting, I initially attached a domestic vacuum cleaner to the outlet. However, it proved to be far too powerful for this cabinet and almost sucked the rubber gloves off of the mountings! So, after some playing I devised a rudimentary solution using an old 12V pump (the camping type, typically used to inflate air beds) connected to the inlet hole. The idea being that the pump creates higher air pressure inside the cabinet and as physics tells us, the air will move (along with the dust) to an area of lower pressure, via the filtered outlet in this case. 


It may appear to be too small to make any noticeable improvement, but I found that it significantly speeds up the rate that the dust clears. On the outside of the filtered outlet I have added a cardboard tube with one end cut at an angle. This is end is placed directly over the outlet hole with the other end faces out of the garage window behind the cabinet. In other words it is a cardboard exhaust pipe and it makes a huge difference in preventing the extracted dust from accumulating in the garage.


At the moment everything is held in place with copious amounts of gaffer tape and although it would be great to fabricate something more permanent, I really just want to get blasting, so sod it - I am going to leave it rough and ready!

Jumat, 11 Juli 2014

Chassis paint has arrived! (Mastic 121)

Just received the hard-as-nails paint that I will be using to coat the chassis and various other components:


Mastic 121 is a two pack Epoxy paint and is highly recommended amongst restorers (believe me, I did a LOT of internet research before choosing my paint system!). Additionally I purchased some FE-123 Molecular Rust Converter, so that I can thwart any sneaky rust areas that I cannot reach with a wire wheel before applying the top coat. 

Most importantly is the correct mask; the epoxy paint is not too pleasant on the lungs if inhaled. At the recommendation of Rustbuster (I phoned them directly to check this) I opted for the '3M 4251 Gas/Vapour and Particulate Respirator'.

Exciting times ahead....

Kamis, 05 Juni 2014

New repair panels!

Took delivery of a bundle of quality treats from Hooky's Panel Shop today:


  • A pillar tool (for door alignment)
  • A pillar (3 screw RH)
  • A pillar (3 screw LH)
  • Screen corner (RH)
  • Screen corner (LH)
  • M8 weld nuts (x10)

Senin, 02 Juni 2014

Front Bulkhead and A-post�s bare all!

During the past week I have stripped back the foot-well and bulkhead area of the shell with the drill-mounted wire wheel:


My drill died about halfway through this task (the 3rddrill casualty so far in this resto), so off I went to the large DIY chain store where I originally purchased it and exchanged it for a brand new one �.ahh, the system works ;-)


It should be noted that the doors have never been particularly well aligned on this car, especially the driver�s side. So, once the wire wheel had made short work of the thick filler layers, I was able to see what was truly going on with those feeble A-posts. The passenger�s side had been repaired in the past using a standard off-the-shelf repair panel, but it looks awkward and somewhat crooked: 

The driver�s side was just patched in a half-arsed way and completely lacks strength, which explains why the door would always drop a couple inches when opened! 


Luckily Hooky�s panel shop make top quality replacements, so I now have some on order along with a handy �Door Alignment Tool�, which will allow me to weld the lower door mounting brackets in perfect position. 


I then removed the remnants of the rotten heater channel that was attached to the front bulkhead using a mini grinding disc attached to the Draper Multi-tool: 


I then ground off the hideous repair patches from the other side of the bulkhead: 


I am not sure how much of this metal work will be kept or how much I will eventually cut out, so I may well be taking the long route by spending valuable time carefully removing these old repairs. However, I find it hard to visualise what needs doing and how things should fit back together with these rusty distractions in the way � so for me it feels like a necessary task...