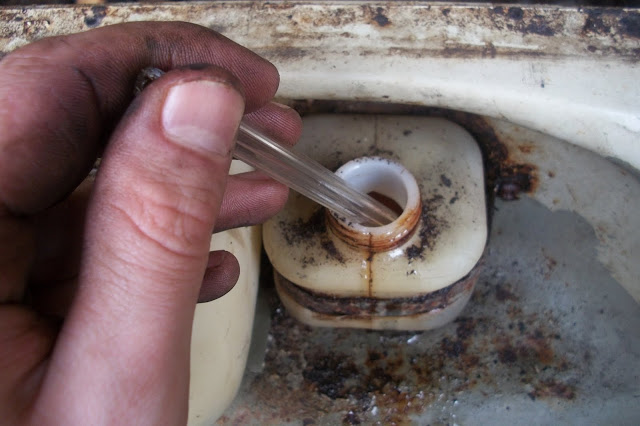
Next I detached the brake fluid reservoir. The first step was to drain the brake fluid using a bulb syringe � unfortunately I did not have one handy and had to improvise by using the casing of a biro as a straw. Using the suction of my mouth I carefully drew the fluid up about half way and decanted it into a tin can by releasing the pressure. This technique is definitely NOT recommended and on a few occasions I sucked so vigorously that I tasted the foul fluid. I can not recall a worse taste and it lingers on your taste buds for hours afterwards!
Next I removed the brake pipe from the master cylinder that was held in place by a rubber grommet and quickly positioned the end of the pipe over the tin can to catch any dribbles of excess fluid.


With the fluid drained I pulled the reservoir out of the car and set it aside for cleaning.
It was held in place by a thin metal strap that is attached to the body by a small phillips head screw.
There was a small tab of metal at the very front end of the chassis tunnel that needed to be folded up with pliers in order to release the pipe.
I then coxed out the washer bottle that sits next to the reservoir using a large flat headed screwdriver to �pop� it out.
The next job was to undo the steering coupler, which connects the rod running from the steering wheel to the mechanism that turns the wheels. It looks like this......
The wire that you can see runs to the horn and can simply be pulled off of its terminal, like so......
Then it was just a case of removing two blots, easy!
Whilst working at the front end of the car I noticed the VIN plate, so I thought I would take a photo and decipher its meaning from the comfort of my home � more on this soon.
After thorough lubrication I was able to remove the two 17mm bolts that fasten the shell to the chassis. They are located just behind the spare wheel well:
Inside the car I removed the four bolts that can be seen under the rear seat. There were two of these on either side of the tunnel:
The bolts that run along the outer edge of the floor pan on the underside would not budge, so rather than forcing them and potentially risk shearing them off I decided to douse them in penetrating oil and come back to tackle them next weekend.
Upon closer inspection inside the car I realised in horror that in a previous repair job to the drivers side heater channel, a large patch had been welded in over the affected area and directly onto the floor pan! The red line on the image below highlights where the weld runs.......
The patch starts directly under the front and runs to the back of the door. In the pictures below the red line indicates the border of the patch and the yellow line shows where the chassis to body seal emerges. In an ideal situation, the seal should be visible all the way along the underside of the door!
I can�t believe that I used to pay people ��� to �fix� my car only to discover all these years later that they actually made things worse by cutting corners, grrrrrrhhhhh! Oh well, I was younger and more na�ve back then with a primary focus on getting the car through the dreaded MOT�s by any means! Anyway, in order to remove the shell this area will need to be cut away. I do not have access to electricity in my garage so will need to acquire either a generator or a cordless reciprocating saw. My shopping list of power tools continues to grow��


Tidak ada komentar:
Posting Komentar