appnext

Jumat, 30 September 2016

P - A - I - N - T

I proudly present to you;


It looks like new, wouldn't you agree?!

Now that the grand reveal is out of the way I will back up a bit and explain the painting process. This was a steep learning curve for me and I would be lying if I said that I wasn't a touch nervous entering into it! For some considerable time I have been mulling over the best method and almost gone down the foam roller and brush route (I kept my receipt, so I can take all those particular items back to the shop). Foam rollers would have been straight forward and simple, but that is not what this project is about! Having asked for advise on the Volkszone forum I opted to spray using a HVLP gravity fed gun with a 2.2mm nozzle. I opted for a cheapo Sealey SSG501 that I picked up off eBay and I also added an additional water trap which mounted to the inlet (I already had the regulator laying around):


My painting paraphernalia:


Thanks to Dangerman who loaned me the use of the adjoining garage to spray in, it would have been near impossible to do it without this space! I thoroughly cleaned the area out so that there was no trace of dust that could be disturbed by the spray gun and end up in my fresh paint!

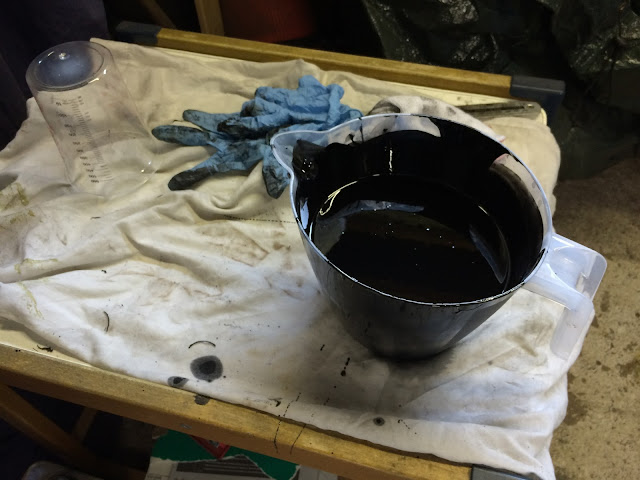
To get the paint to the right consistency for spraying it needed to be thinned by about 20%. For the first layer I mixed up far more than I needed as I had no clue how far the stuff would go, but for the additional coats I only mixed up 720ml (300ml comp A, 300ml comp B and 120ml of No 17 thinners):


A little time-lapse of the first layer going on (unfortunately the camera didn't capture the very beginning):


The best inter-layer adhesion occurs before the previous layer fully cures, so I waited 3 days before adding the 2nd coat and a further 3 days before the final coat. The 2nd and 3rd coats were more challenging to apply as it is obviously not as easy to see the areas that have been freshly sprayed versus those that have not. Requires a bit more focus and strategy, but in on reflection I think I did a pretty good job for my first time!

After a couple of weeks of undisturbed drying time I shall unmounts the chassis from the rotisserie and coat the front and rear areas that are currently inaccessible.

...and relax!

Senin, 26 September 2016

Stripped and prepped

Spent an eternity stripping the temporary primer and grime off of the chassis in preparation for the top coat of Mastic 121. It is hard to stress in words just how time consuming this was - the big flatter areas obviously get stripped relatively fast, but that can be deceiving as it is all the nooks & crannies that become the vortex of time! Here is a breakdown of my pre-paint bare metal process:

  • stripped what I could easily get at with the drill-mounted wire brush and an angle-grinder mounted poly abrasive disc (< this was a true godsend!)
  • masked up the all the chassis orifices and shot blast the hard to reach areas 
  • keyed everything with 80 grit sandpaper to create a suitable roughened surface for the paint to bond to
  • Tack clothed the entire area to remove debris particles
  • Thoroughly panel wiped the chassis to clean and degrease
  • Applied FE-123 into any pitted areas of steel to neutralise any lurking residual rust
  • Once the FE-123 had hardened/blackened I sanded back those localised areas to remove excess
  • Blew entire area over with compressed air (including inside the chassis tunnel for good measure)
  • Final tack cloth & panel wipe all over until no trace of dirt was detectable on the rag

So here is the naked result of my boundless endeavour (NB: these were taken just before I applied the FE-123 because, despite being necessary, it made the chassis look less shiny and presentable);


The next post is going to be epic. The chassis will finally get a lick of sumptuous semi-gloss black (truth be told, I have already sprayed the first layer and it looks pretty damn sweet - but that is a story for another post)...

Senin, 05 September 2016

Funky green channels

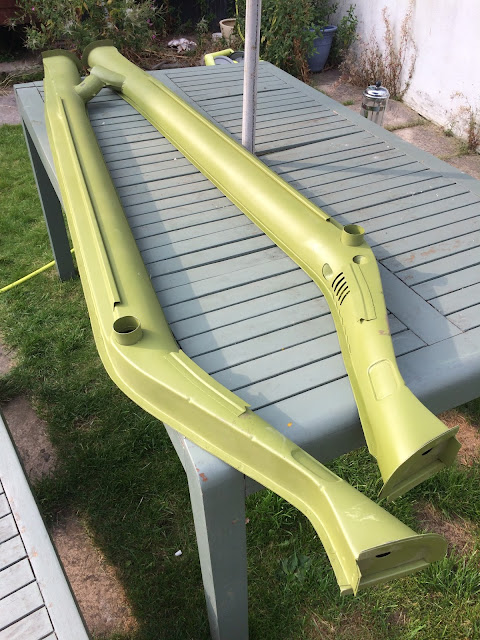
Recently took an epic detour to pick up a new set of 62-67 Klassic Fab heater channels. Far from cheap, but the pressings are crisp and the detailing is top notch (finished by hand I am told). The closest thing to brand new period correct channels that are currently produced anywhere in the world:


Threw them on the pan for a quick test fit:


All the bolt holes line up wonderfully, but I think that the passengers side pan might be slightly out - hoping I can resolve this further down the line when I am aligning the body. I hope...

Minggu, 31 Juli 2016

Quickie: accelerator pedal mount

I have not had much free time to devote to the restoration lately, so this will just be a short and sweet update in lieu of a longer post coming soon (promise!). 

Visual overview of the accelerator pedal mount being plugged into place:


Jumat, 10 Juni 2016

Heater cable guide tubes

This is the deformed remains of one old heater cable tube:


To fabricate suitable replacements I did some extensive internet trawling for suitable images and consulted the VZi forum for stock measurements etc. What I required was 10mm outer diameter steel tube with an inner diameter of 8mm. I hunted around online for a suitable stockist of this particular tube, but couldn't find anything suitable. However, for once I did find what I was after in B&Q of all places (a well known UK diy superstore)! Got a 1 metre length for �3, which I was very chuffed with!


Cut the tube down to size (x2 lengths, 345mm long) using a hacksaw, which left me with a convenitent smaller scrap length to practice bending and welding with:


Had a few thoughts about how to bend the tube to attain the curve I needed. I attempted bending the scrap piece around a small barrel, the runners of a rocking chair, a round garden table ....I was getting close, but not close enough! Now, in a funny turn of events my bicycle picked up a puncture on my way over to the garage and I had taken the back wheel off with the intention of repairing the inner tube after finishing up my resto tasks for the day. As I was staring at the length of tube I happened to gaze up at the detached wheel and had a eureka! moment. I took the tyre off and discovered that I had the perfect jig for this task:


I clamped one end of the tube down under a piece of wood:


Then I gently, yet firmly, bent the tube around the wheel. I used another clamp at the other end to help pull the tube down against its natural tendency to spring back up:


With the tube removed from the wheel it sprung out and rested into the perfect curve. I bent the other piece to shape using the same method and was delighted that they matched:


A quick dry fitting on the car confirmed that my low-tech bike wheel method had nailed it:


To asses the length and position of the factory weld I quickly shotblast the remnants of the old guide tube:


And then proceed to weld my fresh pieces into their final position on the car:


Got a bit carried away and shaped the welds using the Dremel to roughly match the look of the original brazed weld:


The end result:


Senin, 25 April 2016

Quickie: Pan-werk

Finished dressing the plug welds around the inner edges of the pans:


Then turned my attention to the weld bead that should run along the outer front section of the pan/naps hat joint. In typically obsessive Rhysos style, I wanted to ensure that I got this weld as close to 'factory' correct as possible. So I dug out the end of the naps hat from the scrap metal pile and quickly shot blast the topside to reveal the original factory weld:


It proved to be a handy visual aid and my attempt didn't come out too bad:


Yet again, this area won't even be seen when the car is back together, but it is all good practice and nurtures sound working habits (or at least that's what I tell myself!). Did the same on the other side of the car, but it appears I forgot to take a photo. It is just a mirror image of the pic above though, so this blog post probably doesn't need it.

Admittedly progress has stalled slightly in the garage following a spell of tool malfunction and misfortunate over the past couple of weeks. My trusty angle grinder, rotary tool and drill (how many is that now?!) all packed up in quick succession. I am just in the process of procuring some suitable replacements...

Selasa, 29 Maret 2016

Quickie: Battery bracket & bolt

A while back I had the idea of reclaiming the old battery strap retaining bracket and securing bolt from the old scrapped pan half (drivers side). It has been discarded outside and thus exposed to the elements for some time, but the bracket and bolt were just about visible amongst the rust:


With the bracket cut from the pan I started blasting it clean. Promising start:


Drilled the spot welds out to free the piece I needed. Its not actually in bad condition:


Bottom of retaining bolt blasted revealing the original factory spot welds (faintly visible in this photo):

 
Blasted clean and those spot welds drilled out:

 
To be honest, I do not know why I am compelled to salvage these particular parts as the 12V battery that the car now has is too big for the original strap and bracket (which was designed to accommodate a 6V battery). However, I personally think its good that those original features have been considered and incorporated into the rebuild. It will ultimately help to retain some that original 60's stock character - even if the purpose is redundant. Further down the line I may try and create a new strap system to suit a 12V battery and that works with this stock bracket and resembles the look of the original. We will see.

With the exact placement worked out, I drilled a hole in the floorpan ready for locating the retaining bolt:

 
I plug welded it into place on the underside of the pan:


Ground the welds down for a smooth 'factory' finish:


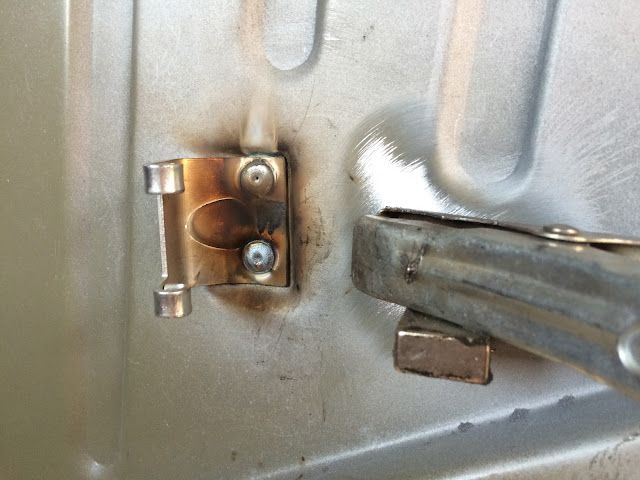
I fixed the battery bracket into place using a triangular welding magnet. Also widened up the spot weld holes to 6mm, which I have found is the minimum width that I can get a decent plug weld from: 


Plugs added and good signs of penetration could be seen on the underside of the pan:


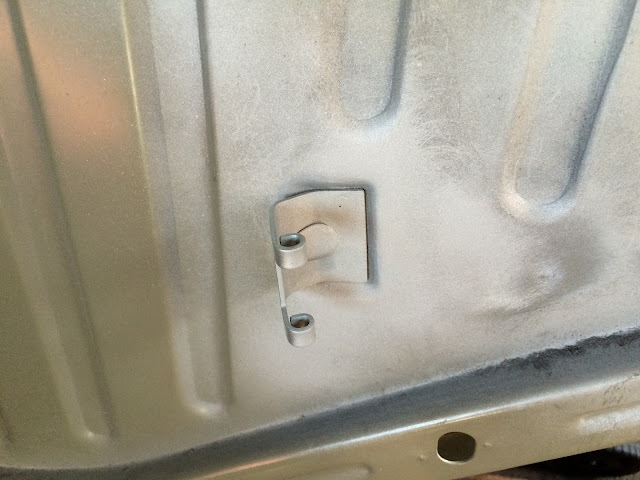
Finished up and given the customary lick of zinc primer:


All done and looking stock fresh: