After a short break I have been back at it with gusto! I started by stripping the top side of the chassis which was a lot trickier to do than the bottom because of all the nooks and crannies at the rear end:
I found my little Dremel tool to be invaluable in the tight areas, but I had burnt through my small supply of attachments in no time. So I ordered a ton of the small barrel sanding bits and some grinding stones (the orange ones), which arrived the next day:
I struggled initially with the frame head as the angle grinder mounted wire brush just seemed to burnish and smooth out the corrosion rather than revealing the good metal beneath. So, I switched to the flap discs (why didn't I think of this sooner!) and my detail sander which made short work of it!
I also smoothed out the tunnel lips that support both floor pans, firstly by grinding down the old spot welds and then sanded smooth with the Dremel. I took a reference shot beforehand of the spacing of the old welds so I can replicate a similar spacing when I fit the new floor pan sections:
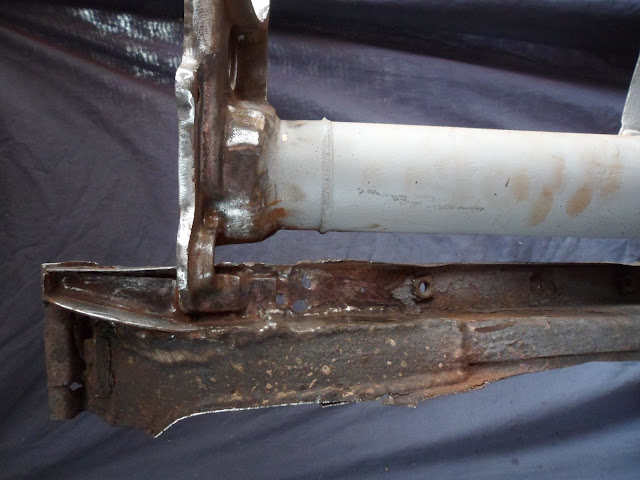
Next I turned my attention to the sorry looking rear floor pan cross braces. The bottom edges were a right mess, but I was keen to save the support strip that mounts onto the u-shaped bracket. It was kind of hard to see in this state if there was actually anything of it left beneath the underseal and patch repairs:
After giving the area an intensive wire brushing and a gentle grind with the cone attachment in my Dremel this is what I was presented with:
What a state! Can you actually call that welding?! Unfortunately there didn't seem to be much support strip left so I will probably cut it all back to the u-shaped bracket and fabricate something equivalent from scratch. The other side was slightly better, but still far from great:
I decided revisit these troublesome areas at a later date in favour of pushing on with the removal of the cross braces. After careful measuring I made my initial cuts:
The ends that attach to the tunnel were seam welded down the sides and spot welded on the top. I adopted a similar approach to what I developed when I tackled the bottom plate, i.e - thin down the seam weld with the grinder until the joint is weak enough to pry apart:
Once the process had been repeated on both sides I finished up my obsessive sanding mission and rolled the chassis outside ready for primer:
....and here is the whole thing sealed with a coat of metal primer to prevent any surface rust creeping in whilst I spend the next few months repairing the pan. Feels good to see such a fresh looking basis for the rebuild:


